Cactus Propagation from Seeds
Introduction: In this eTech Guide, you will learn how to grow cacti from seeds, which I have described in great detail. I have also included sections on how to root Cactus Cuttings and how to use Forced Pupping to make new cloned plants.
The Fastest Way to Grow Cactus
Flat graft cactus seedlings at the first sign of areole formation or new spine growth onto a fast-growing cactus stock. This is usually 2 to 3 weeks after germination for most cacti or slightly longer for really tiny seedlings like Aztekium or Strombocactus.
I prefer to flat graft my infant seedlings onto fully rooted cuttings of Selenicereus grandiflorus. This way your seedlings will grow at least 4 to 5 times faster than normal (even faster with many species) and without the risk of rot or disease.
I recommend starting seeds of Selenicereus grandiflorus about 4 to 6 months before starting any other cactus seeds. Transplant the Selenicereus grandiflorus seedlings when they are 1 to 2 inches tall into individual 2-inch pots. Then about 2 weeks later, cut the stem to only 1.25 to 1.75 inches tall. This will make the plant send out new shoots from the base.
These new shoots will be thicker and stronger than the original seedling stem. When the shoots are 2 inches tall they can be removed and rooted as a cutting.
Rooting of Selenicereus grandiflorus cuttings is very easy to do and is described near the bottom of this page in the Cactus Cuttings section. After the rooted cuttings have grown about 3 to 4 inches tall, they are ready to use as grafting stock.
The original 1.25 to 1.75-inch tall Selenicereus grandiflorus seedling will continue to produce new shoots, providing a continuous supply of new grafting stock. This way you will have plenty of Selenicereus grandiflorus grafting stock plants all ready to go when you first start your cactus collection.
My Preferred Cactus Grafting Techniques
I graft young seedlings at the first visible sign of areole formation or spines (usually 2 to 3 weeks after germination) onto a Selenicereus grandiflorus stock as described in the Grafting Young Seedlings Without Attachments section of the Cactus Grafting Tips web page. Sometimes I will let the grafted cactus grow until it has flowered and set seed, before cutting it off the Selenicereus stock to grow on its roots.
With cacti that I wish to rapidly clone, I will allow the grafted scion to grow at least the size of a round glass marble (usually slightly larger) and then perform either the Split Down the Middle Graft or the Upside Down Graft.
These last two grafting options will allow me to grow the maximum number of new plants in the least amount of time. Another good alternative is to let the grafted scion get reasonably large and then use Forced Pupping to make new cloned plants.
Mixing your Cactus Soil
Basic Recipe (part 1)
2 cups screened rich humus loam topsoil (Do not use heavy clay soil!)
2 cups coarse sand or washed coarse river sand (Do not use fine sand or ocean beach sand!)
1/4 cup gray-colored, fine-grade horticultural dolomite (use up to 1/2 cup if your topsoil is more acidic)
500 to 750 ml of straight hot tap water (2 to 3 cups – depending on the moisture content of the topsoil)
Screening Notes: Use a larger-sized wire mesh vegetable-type strainer for screening the rich humus loam topsoil before measuring. This will remove larger size pieces of organic matter. Measurements are for level amounts (not heaping or rounded measurements).
Basic Recipe (part 2)
4 quarts (about 4 liters) of pumice
2 quarts (about 2 liters) of fine to medium size crushed rock
Particle Size Notes: If soil is to be used just for starting seeds, then screen out the largest size pieces of pumice before measuring. The particle sizes of rock grit to use will depend on the particle size distribution from your source of pumice. I prefer to use granite grit in a mixture of various sizes for my rock grit.
I am fortunate to have a local source of bulk-graded pumice. Your soil must contain a wide range of particle sizes for proper drainage. When transplanting seedlings into larger size pots, be sure to mix in 1 to 3 parts of sterile pumice for every 10 parts of the above soil mix (measured by volume) for better drainage.
Mixing Instructions (Additional Metric Measurement Conversions)
Do not breathe the dust of the dry ingredients while mixing. Use a dust mask if necessary and mix the ingredients outdoors. Use a very large stainless steel bowl for preparing the soil mix. Mix the first group of the above-listed ingredients, including the hot tap water. Then add the pumice and finely crushed rock. Mix until uniformly blended. The soil mix must be uniformly blended.
Sanitizing your Cactus Soil
Heat Sanitizing Soil and Pots in a Microwave Oven at the Same Time
To heat sanitize both the pots and soil at the same time, fill the pots with the above seedling soil mix and place them inside a thick-walled plastic storage container with a translucent snap-on lid. Top spray the soil surface with plain water before microwaving.
This additional top surface spray (using a fine spray from a pump-type sprayer used only for watering) will rinse the finer silt particles further down into the pot, leaving the top of the soil with a more porous surface for planting seeds.
Make sure the soil is fully moist before microwaving. Do not plant the seeds until after the soil is microwaved and cooled to room temperature!
To microwave, the soil, place the lid on the plastic container housing the pots. Be sure to leave one corner of the lid unattached, unless you are using a “breathable” type storage container (which is not air-tight). Otherwise, the lid might explode off of the container inside the microwave. Microwave on full power for about 45 to 60 seconds for each 5 cm (2 inches) square pot filled with soil.
If you have 15 pots, you would microwave on full power for about 12 to 15 minutes (depending on the soil moisture content and other variables). Please note that microwave ovens vary in their power output and you may need to use less time than indicated above.
If you have a temperature probe for your microwave, the center of the soil should be about 200F after heating. Allow the soil to cool before using.
You can also microwave soil (without the pots) inside the thick-walled plastic storage container with a translucent snap-on lid. It will heat more evenly if there is a slight depression or space in the center of the container of soil. If you have a temperature probe for your microwave, the center of the soil should be about 200F after heating.
Warnings
Use adequate ventilation! I use an exhaust fan in my kitchen with a window open while microwaving soil. Do not use aluminum or other metals in the microwave! Do not use those flimsy thin-walled plastic pots or you may end up with melted plastic pots!
The pots I use in the microwave are made of thick hard green plastic. If you do not have a self-rotating platform in your microwave oven, you should turn or re-position the container every 4 minutes.
Heat Sterilization of Soil using a Conventional Oven
Place your soil inside a huge stainless steel bowl covered with aluminum foil and place it inside a Conventional Oven to heat at 300F for about 2 hours (depending on the size of the soil-filled bowl). Leave the bowl inside the oven after turning off the heat and allow it to slowly cool to room temperature with the foil still covering the bowl.
Seed Germination and Planting
Preparation
I use plastic flat bottom 3/4 ounce size condiment cups for holding the seeds while soaking. Mark the inside bottom of the condiment cup with the seed identity code (or plant name) using a permanent black marking pen. Test it first to make sure it is waterproof.
Make sure the seeds are no more than one layer deep inside the condiment container. Use additional containers for larger amounts of seeds. Plastic condiment cups are available from food distribution outlet suppliers. If you are not in a food-related business, they will usually sell them if you pay in cash.
Soaking and Rinsing the Cactus Seeds
For optimum results, I always recommend that you first pre-rinse and spray your seeds for 10 to 20 seconds using hot tap water. Rinse smaller seeds or seeds with a thin delicate seed wall for only 10 seconds. Rinse larger seeds for the full 20 seconds.
When draining the water or spray rinsing the seeds, I use one side of a very fine mesh tea ball-type strainer attached to forceps. I use a custom-made fine mesh strainer for very fine tiny seeds.
This is made by stretching a piece of fine mesh nylon fabric over the end of a plastic pipe coupling (or something similar). The fabric is held in place with a stainless steel hose clamp. Blot the rinsed seeds from underneath the strainer using a clean terry cloth towel and then tap the seeds into a small plastic condiment cup (1/2 to 1-ounce size is recommended).
After all of your seeds have been pre-rinsed and are in their separate condiment cups, fill each of the cups with 1 tablespoon of hot distilled water as close as possible to 65C (149F). Only use distilled water for soaking the seeds.
It is important to realize that although the hot water will cool very rapidly in the small plastic condiment cup, the initially hot water jolt will help to soften the seed wall and allow for greater water penetration as the hot water begins to rapidly cool.
After the water has cooled for at least 30 seconds you can snap on the plastic lid. Then about 2 to 3 minutes later you should vigorously shake each of the containers for a few seconds. If you try to shake the containers immediately after snapping on the plastic lid, the air pressure may deform or pop off the plastic lid.
Place the containers in a single layer on a tray or inside a small flat-bottomed box. I usually turn the leak-proof plastic condiment containers upside down and give them a jiggle/swirl to keep the seeds from sticking.
Warning: This initial rinse and water soaking is the only time you should use hot water. Use only cold water on all subsequent seed rinses and water changes. This is very important for optimum germination results. Follow all of the temperature recommendations precisely. Do not use warmer temperatures than those recommended in the guidelines!
Soak the seeds in a dark place for 24 hours as close as possible to 15C (59F). Then drain the soaking water from the condiment container and briefly rinse your seeds using a gentle spray of cold tap water. Blot the rinsed seeds from underneath the strainer using a clean terry cloth towel and then tap the seeds back into their condiment cup.
Add 1 tablespoon of cold distilled water to each of the condiment cups and soak the seeds in a dark place for another 24 hours as close as possible to 15C (59F). Then repeat the above spray rinse and water change using cold water.
Then soak the seeds in a dark place for an additional 48 hours as close as possible to 15C (59F). This will equal a total soaking time of 4 days in a dark place as close as possible to 15C (59F).
Planting the Seeds
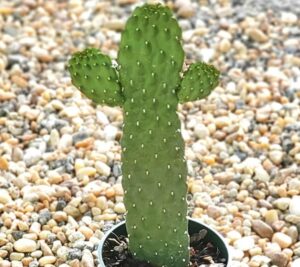
Plant the seeds in sterile soil-filled pots. Plant only one species per pot in a grid pattern of 4, 5, 9, or 16 seeds, depending on the size of the seeds and how many seeds are available. I recommend using 5 cm (2 inches) square plastic pots for starting seeds.
Label each pot with its identification code, the date, and the number of seeds planted. I use old recycled white plastic slats from window blinds that are cut into small thin strips with a sharp pointed end, wiped clean with an alcohol-damp cloth, and marked with a pencil.
Plant all of the seeds directly onto the soil surface (uncovered), except for larger seeds which can be planted just barely below the soil surface. After the seedlings start to grow, you can reposition them deeper into the soil. You may prefer to surround the seedlings with pumice or rock gravel around their base later if necessary.
Most medium to large-size seeds can be removed from their plastic condiment cups using plastic tweezers. Smaller seeds can be removed using an eyedropper to suck up the seed and then “drop” it out. I also recommend small plastic bulb-type dispensers that you can buy from a large hobby store. You can custom cut off the closed pointed end of the plastic tube to whatever size diameter you want (up to about 1/4 inch round).
This is very handy for sucking up larger seeds that are too big for the standard type of glass-eyedropper. Headband-type binocular magnifying glasses are very useful for working with tiny seeds. Place the pots of planted seeds inside clean plastic storage containers, covered with a translucent (not colored) lid.
Important Note: Dip the ends of the seed planting tools (tweezers, bulb dispensers, etc.) into boiling water for 15 to 20 seconds to make sure they are clean and sterile before starting your seed planting session.
If you prefer to use 70% alcohol to clean your tools, make certain the alcohol has completely evaporated before using. Alcohol will kill many smaller seeds almost immediately, so it is usually safer to use boiling water to sterilize your seed-planting tools.
Germinating the Seeds
The Dark Cool Germination Room = No Light at 15C (59F)
Place the translucent plastic storage containers (which house the pots of planted seeds) in a dark location as close as possible to 15C (59F) for up to 10 days unless the seeds germinate sooner. Examine the pots for germinated seeds every 2 to 3 days.
After 10 days in the dark cool germination room, you will need to do one of the following for optimum seed germination:
Option #1. If the seeds show less than 25% germination at this point, then proceed to Option #2 or Option #3. If the seeds show 25% or higher germination at this point, then move them to the Fully Lighted Growing Room (that section is described further below).
Option #2. This option is for seeds from warmer climate plants or very light-colored smaller size seeds from cold-hardy plants, either of which shows less than 25% germination at this point.
Move these pots of seeds to the Fully Lighted Growing Room for 4 days and then return the pots of seeds to the dark cool germination room for up to one week, unless the seeds germinate sooner. Move the pots with germinated seeds to the Fully Lighted Growing Room.
Any remaining pots of seeds that have no sign of germination by the end of this one week will need a 6-week cold treatment period between 40F to 45F inside the refrigerator. After 6 weeks of cold treatment, move the containers back to the dark cool germination room, and repeat the entire above instructions until the seeds eventually germinate.
If you are having difficulty germinating some seeds, then see the Problem Seeds section further below for some additional suggestions.
Option #3. Except for very light-colored smaller size seeds, this option is for most seeds from cold-hardy plants which show less than 25% germination at this point. During the next 4 days, you should move these pots of seeds to the bottom of the refrigerator each night for about 10 hours and then return them to the dark cool germination room for the remaining 14 hours each day.
After 4 days, return the pots of seeds to the dark cool germination room for up to one more week, unless the seeds germinate sooner.
Move the pots with germinated seeds to the Fully Lighted Growing Room. Any remaining pots of seeds that have no sign of germination by the end of this one week will need a 6-week cold treatment period between 40F to 45F inside the refrigerator.
After 6 weeks of cold treatment, move the containers back to the dark cool germination room, and repeat the entire above instructions until the seeds eventually germinate. If you are having difficulty germinating some seeds, then see the Problem Seeds section further below for some additional suggestions.
Warning: Use an accurate bulb-type thermometer inside the plastic storage containers on top of the planted pots of seeds to get an accurate temperature reading. The temperature inside the plastic containers may be slightly warmer than the surrounding air temperature, depending on the location of any nearby heat source.
The Fully Lighted Growing Room
This space is a fully lighted growing area with a maximum daytime temperature of 69F and a 10-hour evening dark period with a minimum temperature of 15C (59F). Do not use warmer daytime temperatures than this until seedlings are at least 4 to 6 weeks old.
After seedlings are 4 to 6 weeks old, the daytime temperature can be increased to 73F for most plants. However, do not increase the daytime temperature above 69F for spring-blooming cold-hardy plants from high-elevation growing regions.
If you are growing indoors using fluorescent lights, I recommend using a mixture of cool white and Sylvania/Osram Gro-Lux light bulbs (tubes). Note that the humidity can be decreased by removing the translucent plastic lid or increased by misting the surface of the planted seeds using only distilled water.
Problem Seeds
After you have tried the 6 weeks cold treatment period and the seeds still do not germinate, then try the following suggestion. Lightly spray mist the seeds from above using my diluted Homemade Fertilizer Solution (1/4 teaspoon liquid concentrate per gallon of water).
Place the pots (still in their plastic housing container) into the Fully Lighted Growing Room for 2 days and then return them to the Germination Room at 15C (59F) until they germinate.
If they still do not germinate after one more week, you may need to repeat the 6 week cold treatment period. If seeds should become covered with algae, simply cover them with a 1/8 to 1/4 inch layer of dry, sterile coarse sand.
Make sure the soil is at the correct pH for the species. Sprinkle on fine dust of dolomite powder to increase the pH. Spray on a light misting of filtered tea water made from peat moss or composted bark mulch to decrease the pH.
Algae Control
Algae can grow fast once the temperature is above 73F. A quick approach to controlling algae is to dry out the surface of the soil using a hot air blow dryer (but not too close). Make sure the temperature on the soil surface does not get too hot.
Then apply a thin surface layer of fine dark lava gravel or use a 1/8 to 1/4 inch layer of dry, sterile coarse sand for ungerminated seeds. Topwater around the edges of the pot only when the soil is dry or nearly dry. Water only with distilled or pre-boiled water until algae are under control.
Transplanting Cacti Seedlings
Cacti seedlings should not be transplanted unless they are at least 12 mm (1/2 inch) round or 5 cm (2 inches) tall, depending on the species. Upon reaching this size, the cacti can be transplanted to a slightly larger size pot (10 cm square) using more open-textured soil.
Therefore, when transplanting into larger size pots, be sure to mix in 2 to 4 parts of pumice or rock gravel to 10 parts of the seed starting soil mix (measured by volume).
I recommend using very large stainless steel tweezer-type tongs for transplanting cacti. Make sure the soil is slightly moist, but not excessively damp. Prick out the seedling as cleanly as possible, including as much soil and roots as possible.
Use the closed tweezer tongs to form a hole in the pot for planting the seedling and gently nudge the soil around the edges of the seedling after planting. Do not compress the soil! Topwater with a fine mist spray very lightly after transplanting and then allow the soil to almost fully dry out before watering again.
Improved Liquid Fertilizer Recipe
Preparation – New 4-step process!
This fertilizer is made into a liquid concentrate using about 4 quarts of 3% hydrogen peroxide instead of water. This is the standard type of hydrogen peroxide sold in most stores near rubbing alcohol or first aid supplies.
All measurements are for level amounts, not rounded or heaping measurements. All the other ingredients are easily obtained from a good Nursery Center, Farm Feed type store, or over the Internet from online vendors. I found my Calcium Nitrate at a Pottery Supply store.
Concentrated Fertilizer – Makes one gallon of concentrate
Step #1:
Start with one quart of 3% Hydrogen Peroxide
Stir in one level tablespoon of Mono Potassium Phosphate until dissolved
Stir in one level tablespoon of Potassium Nitrate until dissolved
Pour this solution into a one-gallon plastic container.
Note: If you want a slightly higher nitrogen fertilizer to boost greener foliage, then add 1 teaspoon of Ammonia Nitrate and 1 teaspoon of Magnesium Sulfate to the above solution. However, these additions are generally not recommended for growing sensitive scree-type plants, most cacti or succulents with lower nitrogen requirements.
Step #2:
Start with one quart of 3% Hydrogen Peroxide
Stir in two-level tablespoons of Alaska Liquid Fish Fertilizer 5-1-1 until well mixed
Pour this solution into the same one-gallon plastic container described in Step #1.
Step #3:
Start with 1 quart of 3% Hydrogen Peroxide.
Stir in one level tablespoon of Calcium Nitrate until dissolved.
Note that Calcium Nitrate may have some noticeable residues that do not completely dissolve.
These impurities should be filtered out of the solution using a cone-shaped coffee-type filter. Then pour this filtered solution into the same one-gallon plastic container described in Step #1.
Step #4:
Fill the remainder of the plastic jug with 3% Hydrogen Peroxide, put on the lid for just a few seconds, and shake well. If there are carbonate impurities in your chemicals, it might be a good idea to leave them off the lid for a few days after mixing to allow the excess carbon dioxide to vent out of the container.
For best results, label and store this fertilizer concentrate in a dark cool location away from children. Remember that this is a concentrate and needs to be diluted as described below. Don’t forget to shake the container before measuring.
Dilution for Use:
To use this fertilizer, add 1/4 teaspoon per gallon of water for most plants grown indoors.
Cactus, scree-type plants, or fertilizer-sensitive plants use only 1/8 teaspoon per gallon of water.
To boost plant growth outdoors once a month, use 1/2 to 1 teaspoon per gallon, depending on the soil moisture and the type of plant.
Indoor Watering Tips
I keep most of my plants in small pots inside trays. I bottom water with dilute fertilizer water for the main bulk of my watering. However, first I top water spray almost all of my plants using plain water or dilute fertilizer water just barely spraying the soil surface.
This provides just enough near-surface watering to help the soil more rapidly absorb water from the bottom watering which follows the top surface spray.
This is much faster than trying to water the entire tray of plants with only top surface water spraying and saves lots of time. It also prevents fertilizer salt from building up near the surface which is a more common problem with bottom watering only.
Also, you can better control the algae growth by using only plain water for the surface spray watering and using fertilizer water for only the bottom soak watering. If an algae problem does arise, apply a thin surface layer of fine dark lava gravel or coarse sand.
With practice, you learn about how much water to add to the trays so the soil gets properly watered. I drain or siphon off any excess water that remains after 1 to 3 hours of bottom water soaking, depending on the type of plants and the water level when soaking.
I group my plants by trays according to their similar watering and fertilizer needs.
Cactus Cuttings Propagation
General Preparations
Read This First: I have not found any significant advantage to using rooting hormones, so I no longer use them. Cacti to be rooted should be moderately watered only with plain water (no fertilizer) 3 to 5 days before the operation.
Fill a pie plate about halfway with coarse sand and cover it with aluminum foil. Bake in an oven for 30 minutes at 300F, turn off the oven, and allow the sand to slowly cool the oven until room temperature. Keep the sand covered until ready to use so it remains sterile!
Making the Cut: Lightly mist sprays the areas to be cut with 70% isopropyl alcohol. This alcohol spray is usually not necessary for taking cuttings of Selenicereus grandiflorus unless they have been grown in a dirty, windy, or dusty environment. Be certain that the alcohol has completely evaporated before making your cut.
It usually takes about 30 to 60 minutes for the alcohol to completely evaporate, so prepare all of your plants ahead of time. Use a sterile sharp blade for cutting. Remove pups by cutting them off close to their base using a sterile blade. Recent comparison tests have shown that pups that are twisted off for rooting will not grow as many roots or grow as quickly compared to a pup that is carefully cut off.
Healing the Pup or Cutting
Place the cut end of your pup or cactus cutting directly into the prepared sterile dry sand-filled pie plate. Do this with all of the cuttings you wish to make. If the cutting will not stand up on its own, then press the cut end into the sand and then lay it sideways on the dry sterile sand.
Place the pie plate with the cutting in or on the sand into a large plastic housing container along with an open container of hot water to increase the humidity inside the container.
Place this in a dark area at room temperature for 5 days while the cut end of the cactus heals. If the humidity inside the container is just right, the cutting will heal without becoming too dehydrated.
Important: When rooting cuttings, make sure that the container is kept in a dark area for the first 5 days. If the cutting gets light during the first 5 days after separation, it may take 1 to 2 weeks longer for roots to begin growing, depending on the type of cactus. Make sure not to touch the cut surface of the cutting with anything while it is healing during these 5 days.
Planting the Cactus Cutting
Now plant your healed cutting into a pot of sterile damp soil. First, prepare a hole in the damp soil for the cutting to go into by using a sterile knife or large tweezer-type tongs (wiped with an alcohol-damp cloth). The soil should be only damp enough to form a clean hole without the soil falling back into the hole when the knife is removed.
When you put the cutting into the prepared hole, the cut bottom should not come into full direct contact with the damp soil but have a very slight air space underneath. This will allow the roots to grow more quickly will less chance of root rot.
Place the potted cacti inside a large clear or translucent plastic storage container in a moderately lighted area (no direct sunlight). Add an open container of hot water to raise the humidity inside the container if necessary.
Keep the planted cuttings inside the plastic humidity-controlled container for about 2 to 4 weeks. Then remove from the protective container and water with a fine mist spray from the top as needed. Do not use any fertilizer or water too heavily until after significant new growth has occurred.
Rooting Cacti with Aerial Roots (Selenicereus Grandiflorus)
Most of these types of cacti do not need to have their cut end healed or callous before planting. Simply dip the cut end into sterile sand and then plant the cutting as described in the above section.
Ideally, the cutting should have at least one aerial root which is below or at the surface of the soil. The aerial root growth will support the plant and allow it to grow more quickly until a new root grows from the cut bottom.
You may also like this:
Rooting Cacti without Aerial Roots
Follow the instructions above in the General Preparations section
Rooting Ariocarpus, Aztekium, and Strombocactus
Sensitive cacti prone to excessive dehydration (upon cutting) such as Ariocarpus, Aztekium, and Strombocactus can be easily rooted by performing an unusual method of cutting, separation, and re-bonding without using any attachments! Be sure to use a sterile razor blade for the initial cut.
Cut through the base of the grafted cactus or pup, but leave a very tiny thin edge of skin section attached on one side of the grafted cactus or the uppermost side of a pup. Do not remove the cut cactus!
It will stay attached via the remaining uncut thin edge skin section and the cut surfaces will start to heal if gently pressed together briefly (do not use attachments to hold the cut tissues together unless necessary). Keep the cut cactus in a dark place.
The next day (24 hours later), go ahead and physically separate the re-bonded tissue by lifting it from opposite the uncut side of the cactus… Be very careful to leave the small tiny thin edge of the uncut skin section intact, and then once again press the separated surfaces back together. Keep the cut cactus in a dark place.
Repeat the above process each day until the physically separated surfaces will no longer bond back together. Once this occurs, you will then need to cut through the tiny amount of remaining uncut edge skin to fully remove the cactus.
If this tiny remaining uncut skin area appears discolored (from bruising or rough treatment during the attaching and re-attaching process), be sure to completely cut off all of the discolored or bruised tissue before attempting to root the cutting. Now heal that final cut tissue area just like a regular cactus cutting and follow the directions detailed in the General Preparations section.
Forced Pupping (Making New Cactus Clones)
Round and squat-shaped cacti are your best candidates for this type of procedure, although it can also be performed on a taller torch-type cactus if you wish.
However, with taller torch-type cactus, you can simply cut off the top of the cactus to promote new shoots. Forced pupping is an easy practical way to grow many newly cloned plants rapidly, without resorting to any further grafting.
With this method, you simply remove the new cactus pups as you would a cutting (once they get marble size or larger) to grow on their roots. Once a pup is removed, other new pups will then start to grow from the mother plant. This method works best on a fast-growing grafted cactus, but can also be used on larger cacti that are not grafted.
Carefully ream out the very top center tip of the cactus using a sterile round tip or round nose tip reamer bit (I use 1/8 or 3/16 inch round tip reamer bits on a 3/8 inch shank). This is done by holding the shank of the round tip reamer bit between your thumb and fingers.
Then rotate it back and forth while applying a slight downward pressure at the very top center of the cactus.
The ream is only deep enough to reach the apical meristem, which is the part that you need to remove. You should see a very tiny dot or circle at the center of the cactus if you went deep enough (easier to see the following day after the cactus wound has healed).
Remember to spray/wipe the reamer bit with an alcohol-moistened rag and allow it to dry before using. Round trip or round nose tip reamer bits are usually available at larger hardware or specialty tool stores in their drill bit section or router bit section.
Since you will have a miniature crater on the top of the grafted scion, avoid overhead watering and never allow water to accumulate on the top of the cactus. If water does accumulate, blot it off with a clean paper towel or tissue.
Once the new pups start growing and are large enough, they can be rooted to grow on their own. If you wish, smaller-size pups can be individually grafted onto a 3 to 4-inch Trichocereus stock for more rapid growth.

